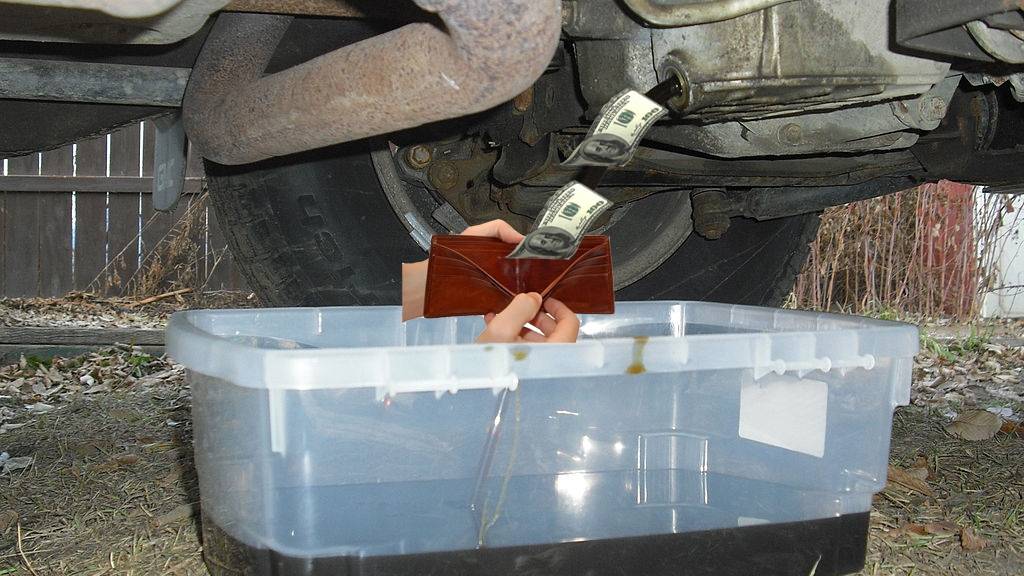
Owning a car certainly has its benefits, but it can be somewhat expensive to keep up on maintenance. Some of us have been doing our own basic maintenance for years, while others are afraid of messing something up and would rather leave that to the “professionals.” I emphasize the word “professionals” because if you routinely hit up an oil change location or any random garage, you may be trusting your ride to technicians without formal training. These techs are often pressed to race the clock, as well.
In all fairness, I spent a couple of my younger years as a Valvoline tech and received plenty of on-the-job training. Still, there’s nothing like doing your own maintenance. You can actually save yourself a decent chunk of money performing some basic maintenance yourself. And, in doing so, you’ll also get to know your car better and have a nice sense of accomplishment when you’re done.
In this article, I’ll cover some of the basic maintenance procedures that can be done with minimal tools and a little bit of elbow grease. Of course, every make and model are different, so it might be a good idea to invest in a manual for your vehicle. For the most part, however, each process can be summed up in general, and it just might give you the confidence to try it yourself. Some of the topics I’m covering are really basic – like changing an air filter, for instance – but even something like changing your own transmission fluid could be within the realm of your abilities, and you didn’t even know it.
So, let’s take a gentle first step into the world of performing your own car maintenance.
Prelude
You may find yourself asking just what the hell qualifies me, an automotive journalist, to give you advice on doing your own maintenance. Well, I can answer you. I grew up working on cars. I know, you’re thinking “Oh great – he’s one of those guys,” but don’t click away just yet. I’m a certified master mechanic that has held multiple certifications through the State of Michigan and ASE (Automotive Service Excellence) and spent the better part of the last 15 years wrenching as a professional.
So what turned me into an automotive journalist? Well, that’s a long story. To put things shortly, my personal health has played a small part, but the biggest thing is the ambition you lose when you wrench on other people’s vehicles day in and day out. Mechanics are said to have the worst maintained vehicles on the road, and I’m here to tell you that there is certainly some truth to that statement. Working 10 to 12 hours a day, sometimes seven days a week really makes it hard to work on your own projects or even do your own maintenance – you just don’t have the same drive when you have the time to work on your own stuff. So, I started writing about them instead of fixing them. Now you know, so let’s talk a little about the maintenance that you can do yourself.
The Oil Change

Oil changes aren’t what they used to be. Back when I learned how to do it in my father’s garage, the rule was simple: change your engine oil every three months or 3,000 miles. For some of you that drive older vehicles, this may still hold true, but anyone who owns a newer vehicle knows that rule is no longer applicable. Nowadays, most cars can go up to a year or about 10,000 miles between oil changes. This is largely thanks to the widespread use of synthetic oils, new oil additives, and oil life measurement systems found in just about every new car. The new rule of thumb is that your oil should be changed when the oil life system tells you to do so. This could vary from anywhere between 3,000 miles and 10,000 miles depending on where you live, your driving style, driving conditions, and a host of other factors like average engine temperature, average engine speed, etc. If it’s been a year since your last oil change, and you have yet to get the oil life warning (common for those who drive very little,) your oil should be changed. Do it at least once a year, regardless of what the oil life system in your vehicle tells you. Can you change the oil yourself? Probably. Let’s talk about it.

Changing your oil is simple, and you won’t need too many tools to do it. The list of tools includes an oil drain pan, empty jug with cap, basic wrench set, filter wrench, new oil, new oil filter, floor jack and jack stands, or car ramps. For the record, your basic car ramps are pretty cheap, easy to use, and probably your safest bet. Changing your own oil is simple on most vehicles, but the process will differ depending on your year, make, and model (this is where a cheap aftermarket repair manual could be handy.) To put it simply, once the car is in the air (I recommend using ramps) it’s pretty simple. Remove any plastic or metal shrouding under the engine – normally held on by plastic retainers or small screws – then remove the oil cap. Locate the drain plug on the engine's oil pan. Place a drain pan below the drain plug with the center of the pan just ahead of the plug. Loosen the plug with a wrench, then remove it by hand. As the plug is about to come free from the pan, quickly pull it away to prevent getting oil all over you. Wipe the plug down with a shop rag and replace the gasket if it is of the paper type (available at most parts stores for a buck or two.) Once the oil flow slows to a drip, install the plug and tighten it snugly, but don’t over tighten it or it can ruin the pan.
Cartridge or spin-on filters

Now that you’ve drained the oil, it’s time to tackle the oil filter. Some cars still use a spin-on type filter. These are typically accessible from under the vehicle, but the location will vary by make and model. Once you find the filter, use a filter wrench to turn it counterclockwise and remove it. Check to make sure the gasket came off with it. If not, remove it from the mating surface on the engine. Wipe down the mating surface, then apply a thin coat of oil to the gasket of your new filter. Thread the filter into place and tighten it by hand until it is nice and snug. No reason to tighten it excessively.
Canister style filters

Some cars have canister style filters which are a little different but easily tackled as well. These types of filters have a permanent housing that is located somewhere on the engine. You simply replace the media inside of it. These setups usually have a steel base with a black plastic top, however, some models also have a metal top. The removable top generally has a large hex head on top to make loosening and tightening with a socket, ratchet, and extension (or a wrench, if there is room) nice and easy. The caps typically follow the righty tighty, lefty loosey philosophy.
Once the cap is loose, you lift it straight out of the housing and the filter media comes with it. Simply pull the media from the cap and snap the new media in place. Remove the O-ring from the cap and replace it with the new ring that came with the filter, then install the cap. These are typically tightened to a specific torque that is often noted on the cap. It’s best to use a torque wrench to make sure you don’t over- or under-tighten them, but you can typically get away with just snugging it once it sits flush with the base. It’s not recommended, but you can bet your local oil change place uses this philosophy on the regular.
Filling
Now that you’ve drained the oil and replaced the filter, it’s time to add fresh oil. First, determine the amount of oil your engine holds. You can find this in your owner’s manual, an aftermarket repair manual, or it may be written with a paint marker somewhere under your hood. You never get all of the oil out of an engine during an oil change, so add the total capacity minus one quart. Wait a few minutes, then check the oil level with the dipstick. Add oil in quarter-quart increments and check the level again until the oil level is in the middle of the operating range. Don’t fill the engine past the top full mark on the stick.
Once your engine’s oil level is within the recommended level, replace the fill cap and start the engine. Let it run for about 20 seconds, then shut it down. Make sure there are no leaks around the plug or filter. At this point. back the car off the ramps. You'll want it as level as possible when adding the last quart. When the oil level is where it should be, you’re done. Pour the used oil into a container and take it to a local recycling center or oil change location. Some places take it for free, while other may charge you a few bucks for disposal.
Tire Rotation

Tire rotations are normally done with oil changes and should be done every 10,000 miles to get the most out of your tires. This allows the drive tires and free-spinning tires to wear evenly throughout their life. Tire rotations are easy but do require a floor jack and jack stands to do it safely. To start, you’ll need to loosen then lug nuts on all four wheels – don’t take them off, just break them loose. This can be done with the tire iron included with your vehicle, a four-way tire iron available at any parts store, a breaker bar and socket, or an impact gun – the choice is yours. Once they are loose, lift the front end and secure it on jack stands, then do the same for the rear. Note: Refer to your owner’s manual or a repair manual for safe lifting points and jack stand points. Once you have the car securely on jack stands, gently shake the vehicle to make sure it sits securely off the ground. If it moves, wobbles or seems otherwise unsafe, check the location of your jack stands, reposition them, and then check again.
Once the car is in the air safely and securely, remove the lug nuts from the wheels on either side. Move the rear tire to the front and the front tire to the rear. Some cars recommend swapping sides too. That means the right rear tire moves to the left front location, and so on. If your tires have a directional tread pattern, swapping them front and rear is the only method. Even still, some vehicles like dedicated sports cars have larger tires on the back than the front. In this case, a tire rotation is impossible.
Snug the lug nuts as best you can, then repeat for the other side. Lower the vehicle to the ground, then tighten the lug nuts. The industry standard is typically 100 pound-feet of torque in a crisscross or star pattern, but your owner’s manual or repair manual can give you the exact torque and pattern. Using a torque wrench for the final torquing is the safest way to go, but a lot of people just make sure they are nice and tight. Always retighten the lugs 50 miles after doing a tire rotation for safety purposes.
Air Filter

Air filters should typically be replaced once a year or every 10,000 to 12,000 miles. For the most part, air filters are located under the hood, near the front of the engine bay and are easily replaced, Normally, this process involves opening up a couple of clamps or loosening a couple of screws with a screwdriver. Once the lid for the air filter assembly is loose, you can remove it enough to access the paper air filter within. The filter typically lifts right out, and the new filter drops right in. Most air filters are the paper media type, and the open-ended side typically faces away from the engine's throttle body or air intake tube. Once the new filter is in place, install the lid and secure the clamps or tighten the screws. Throw the old filter away.
To determine if your filter needs to be changed, remove it from the filter house and hold it up to light. If you can see light through it, shake as much dirt or debris from the filter as possible, then reinstall it. It’s also a good practice to bust out the old shop vac and remove any debris built up inside the air filter house. You would be surprised how many mouse nests I’ve found in filter housings over the years.
Automatic Transmission Fluid Change

This is probably the most dreaded of all basic maintenance procedures and is widely misunderstood. First off, oil change places will almost always tell you that it’s time to “flush” your transmission. Never ever ever ever, agree to this procedure, and I’ll explain why. While every quick lube and oil change place on the planet probably has transmission flush machine, avoid them like the plague. Just about every auto manufacturer out there will tell you not to have this procedure done. This specific procedure basically pulls out the old fluid and replaces it with new, but it’s not as good as it sounds. As your vehicle is driven and the metal components in a transmission go through normal wear and tear, there will be little shards of metal that make their way to the transmission pan. When someone does a transmission flush, these metal shards that are normally stuck to a magnet on the tip of the transmission drain plug or the pan itself can be pushed back through the transmission's valve body and can lead to slipping gears, internal clutches, and ultimately complete transmission failure.

Most manufacturers recommend a basic filter change and fluid replacement only. This does vary widely depending on the year, make, and model, so you’ll definitely want one of those repair manuals for this one. Don’t let that scare you away, though. Some transmissions – like CVT transmissions and dual clutch transmission – and even some of your basic automatic transmissions have an internal filter that can’t be changed. In this case, it’s simply good enough to drain as much fluid as possible and replace it. But, this is also where it might get tricky. Some transmissions have a drain plug, just like the engine. Others don’t have a drain plug at all. Let’s talk about what you have to do.
With a Drain Plug
If your transmission pan has a drain plug, you start off draining the transmission just like you do the engine oil. It’s nice and simple. Let the fluid drain until it begins to drip, replace the gasket or drain plug (if recommended) then snug the plug. If your transmission has a replaceable filter, you’ll have to do a little more work. Some vehicles, like a lot of Subarus, have a canister type filter that looks almost identical to the traditional oil filters. They are normally colored red, however, to help you tell the difference. These are replaced the same way as an oil filter. Other transmissions, like GM’s 4L60-E, for instance, has the filter stashed away behind the pan. This means that once the transmission fluid is drained, you’ll have to remove the transmission pan.
Once the pan is off, throw away the old gasket. Locate the filter where it attaches to the transmissions valve body, remove the retaining screw or screws, then pull the filter out of its mounting hole. Installation is the reverse of removal, and the retaining screws are typically snugged. Wipe down the mating surface of the transmission pan and the transmission (you can even use some carb or brake cleaner to help clean out the inside of the pan.) Install a new gasket on the pan, making sure the holes in the gasket match up with those of the pan, then install the pan. Tighten the bolts hand tight, then torque them accordingly. The torque value, normally in inch-pounds, can be found in a cheap repair manual or is sometimes cast into the bottom of the pan.
Do not over tighten the screws. Most transmission pan gaskets are made of cork. Overtightening can compress the cork too much and creates leaks. In extreme cases, it can break the gasket, and the leak will be even worse. On a side note, cork gaskets typically wick a little fluid after years of use, so don’t be surprised if your pan is dirty or appears to have a very minor leak – this is actually normal.
Without a Drain Plug
This is one of those situations where you’re going to start cussing out some random engineer you’ve never met. Draining the transmission fluid from a trans without a drain plug can be a royal pain. The best method is to use a vacuum tool to draw the fluid from the pain through the transmission’s dipstick tube. This makes the situation a lot less messy. Otherwise, you’re going to need a big drain pan, some patience, and probably some kitty litter. The best way is to place a large drain pan below the transmission pan, then loosen each pan bolt by a couple of turns. Once loose, use a small pry bar or even a flat-head screwdriver to separate the pan gently from the case. Fluid will run out between the pan and case. Once it has drained, hold the pan in place with one hand, remove the bolts, then gently lower the pan. Dump the remaining fluid, then proceed to clean the pan and replace the filter, if equipped. Installing the pan is the same as on pans with a drain plug, but as I said before, make sure not to over tighten.
Filling
This is where things get confusing. Your owner’s manual or repair manual will tell you that the transmission holds what seems to be an excessive amount of fluid. Never add the total capacity to the transmission. When you do a simple fluid change, you get maybe 60- to 70-percent of the fluid at best, and you definitely don’t want to overfill. Take a look at how much fluid you drained from the transmission and use that as a frame of reference. Once you’ve replaced about the same amount that you removed, remove the dipstick, then start the engine. Cycle the transmission through its gears (from park to reverse, then through the drive ranges and back again. Don’t move the car, just cycle through the gears real quick. Some cars require the transmission to be in Park or Neutral for level checking, so check your owner’s manual or repair manual to check for sure. With the engine running, install the dipstick, then remove it. Check the level. If it is in operating range, you’re good to go. If not, add fluid in quarter-quart increments until it is at the optimal level.
Note: always check for leaks after changing your trans fluid, and always check your transmission fluid level on level ground. In general, transmission fluid should be changed every 60,000 to 100,000 miles depending on the year, make, model, and average driving conditions of the vehicle
Conclusion

I know that some of these maintenance procedures can seem a little daunting at first, but doing them yourself will help you learn about your car and will save you a decent chunk of change. For instance, doing the transmission fluid and filter yourself will cost you can save you up to a couple hundred dollars, depending on your vehicle. A typical oil change these days (thanks to the use of synthetic oil) will set you back close to $100, but you can buy the oil and filter yourself for somewhere around $60 at most in most cases. Most lube shops will charge you anywhere between $20 and $40 for an air filter when you can get one for as low as $10 at your local parts store in some cases. It’s not much at first, and if you have to purchase some tools you might spend a little more up front, but knowledge is power, and in the end, you’ll be more confident, know a little more about your car, and will save money in the long run. With that said, I want to leave you off with a few warnings:

- Never start an engine without oil in it or as a method of “getting it all out,” you will be walking to work.
- Don’t overfill anything or assume it’s okay to be a quart short; it’s not.
- If you’re not sure of something or feel that something is outside of your learning ability or expertise, don’t risk it. It’s okay to admit it's above your pay grade in that department.
- Never use a jack, scissor or otherwise, to support a vehicle. A jack’s purpose is for lifting only, and crawling under a vehicle supported only by a jack isn’t only dangerous, but it’s just outright stupid.
- Even on jack stands, sliding a wheel and tire under the frame rail of the vehicle before working on it can save your life, should a worst-case scenario happen.
-Always check the vehicle for stability when on jack stands before crawling underneath it.
- If you’re going to do your own maintenance, get yourself a decent floor jack. They are much easier to work with, are much safer, and a 2-ton model suitable for most cars can be had for around $50
- Never sacrifice safety to make a job easier or quicker; you’ll only regret it later
Stay tuned for part two in the near future.